
What elements identify a scene as coming from an underwater world? Marine plants and animals to be sure, but it is the the more subtle details that give the scene its realism: the green or blue murky tone of the waters, the faintness of the shadows cast by the objects in the scene and pattern of light created as sun shines down through the irregular surface of the water surface above. Light gets refracted unevenly when it passes through the moving waves and ripples of the surface and produces what is known as a "caustic" effect.
A simple example would be the white shining light moving in stripes inside a swimming pool. This sort of swimming pool image is widely available in photo image collections or can be created from scratch with KPT3.0. (The full sized pict I used for this tutorial is included in the folder.)
Setting the stage
It is easier to create and arrange your scene before you begin working with the lighting effects. As you do test renders to position objects and tweak the scene elements, your work will not be obscured or slowed by heavy fog and dim lighting.
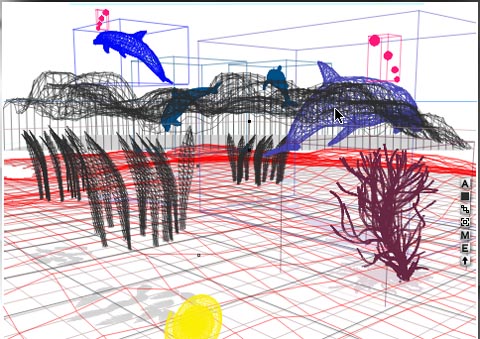
My tutorial scene file has only two terrains. There is a low altitude, high resolution one in the foreground and a low resolution cliff in the background to give the illusion of great distance in the scene.
The texture applied to these terrains began as the preset "Grand Canyon" because I wanted a sandy bottom. I knew the bright reddish orange of the original would be masked by the lighting effects when I applied them. Alternatively there are other rock and mud textures that would be good starting places for a rocky, barnacle or coral covered surface, like "Fresh Clay" and "From Underneath". If that is the effect you are going for, be sure to experiment with different amounts of noise in the terrain editor to give the rock a rough and pitted surface. (fig. noisetest) Left side is the original terrain with "AlienRock"texture from the Basic menu applied; the right side shows the same terrain with mounds, slope noise and basic noise applied.
After you have composed a scene that suits you. It is time to add in the atmospheric effects and the pict which will produce your caustic shadow.
With this method you will use only the sun as the light source. You may want to give the sun a blue or green tint. Be sure to set the shadows to 50 or less, you would not expect to see hard edged shadows under water. As you can see I used a greenish gray shadow color slightly darker than my fog color. (fig.-Skysettings) you want to use fog rather than haze in the image because haze is too concentrated at the horizon line and you want a more even distribution of the murkiness. Set the fog height to 100 then use the sky dome controls to raise it above your camera's view. Set the density of the fog to suit your own artistic sense, it doesn't take a lot of fog to begin obscuring the objects of the scene. I have only used a setting of 11 in my Sunlit Dolphins scene.

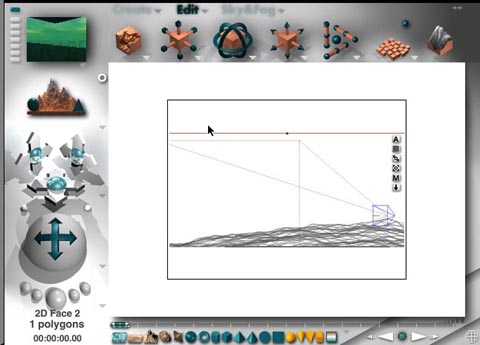
Create a square 2D horizontal pict to apply your caustic pict to as a 2-D material. Do not select infinite plane, that stretches the pattern too much. Increase the size of the pict square to cover the extent of your scene (fig.topview).

Set the pict as low over the camera as you can without the pict showing in the camera's view. It helps if you aim the camera down 5-20 units. (fig. sideview).
In B3 I find setting the texture value as 50 yields good results. Too big a pattern gives you huge bands of light on the ground that look unreal. Using too small a setting will make the repeat in the pattern obvious. You can see a bit of a repeat in the size settings example below at 50 but once this is applied to a terrain the shapes and shadows of the terrain itself will break the patterning up.

fig. texture size variations.
For this image I let the pict drive the amount of Ambience and diffusion and used a pale turquoise in the color channels. After some experimentation I found a value of 20 in the transparency worked best with this particular pict. (fig-materials). From this point you will have to do some experimenting with the alpha channel, transparency and the size of the tiling to get the pict to cast the caustic shadow that best suits your own particular image.

And here is my final Sunlight Dolphins image. The original scene file is included here for you to dissect and play with. Enjoy ;-)
